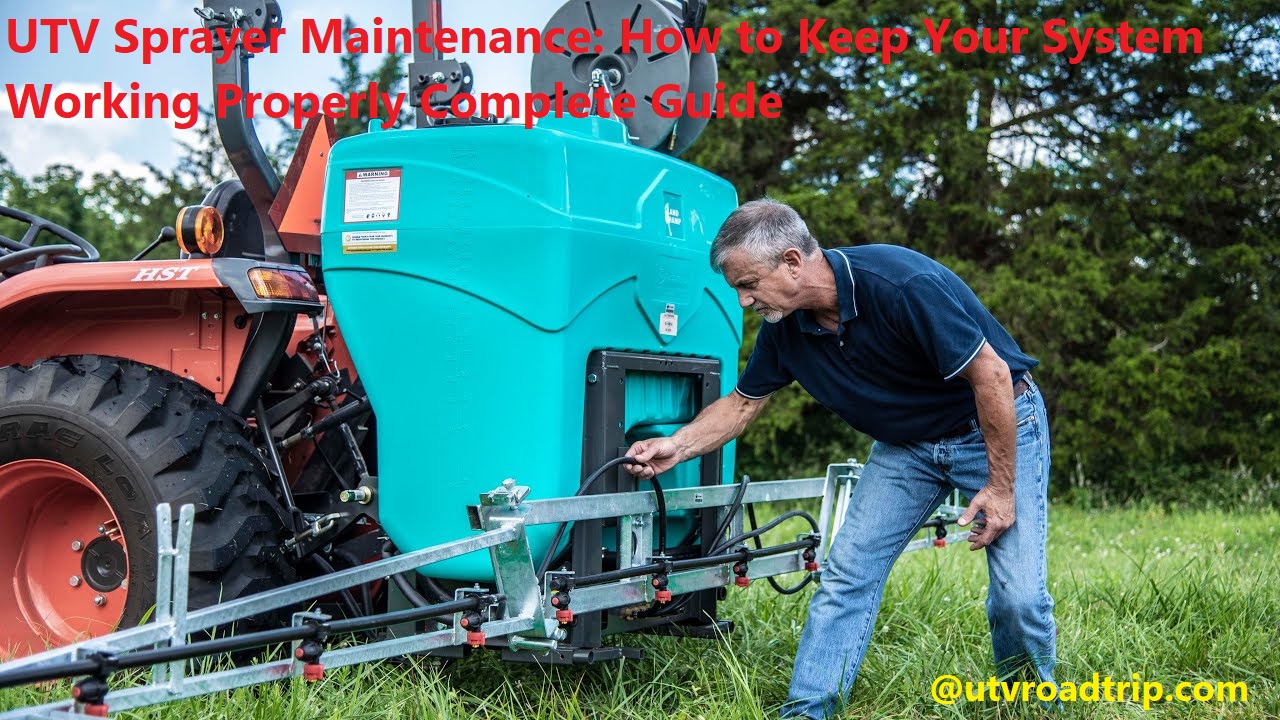
Are you worried that your UTV Sprayer might not work properly? Don’t worry! With this comprehensive guide, you’ll learn how to keep your system in tip-top shape, and get the most out of your spraying system.
Read on for expert advice on maintaining UTV sprayers and ensuring optimal performance.
It is essential that you properly maintain your UTV sprayer system so that you can ensure it will be able to continue functioning and performing to its best capacity. Proper maintenance not only ensures the longevity of your system, but also helps maintain optimal performance. This guide will provide a comprehensive overview of UTV sprayers and discuss some of the basic maintenance requirements to ensure your system is working properly.
In this guide, you’ll learn about:
- Different components of an UTV sprayer and what role each plays in the system
- The importance of cleaning and inspecting components for wear and tear
- Regular maintenance procedures for ensuring proper operation
- The importance of preventive maintenance
- How to troubleshoot common problems with UTV sprayers
Preparing for UTV Sprayer Maintenance
Before beginning UTV sprayer maintenance, it’s important to know the specific parts and components of your system. The components that make up the typical UTV sprayer system include a tank, a pump, hoses and nozzles, electrical wirings, clamps and mounting parts, a control panel, and if applicable a herbicide pick-up tube. By understanding each of these parts and how they fit together you can identify any potential repair or maintenance issues before they arise.
To start off with maintenance we recommend inspecting the entire unit for signs of wear and tear such as worn out wiring or broken hoses/nozzles. Additionally you should also check the pressure relief device that is located inside the tank unit making sure it is in good condition and will work properly during use. You should also inspect all of your pressurized hoses for any visible damage that could cause the sprayer to leak which can lead to reduced system performance.
In addition to checking these components it is also important to replace any filters on your spraying equipment every so often (on average around every 6 months). This will ensure proper filtering of water or chemical applied materials going through your system for maximum operation efficiency.
Safety precautions
Prior to servicing or maintaining your UTV sprayer, it is of utmost importance to ensure the safety of yourself and others. Before beginning any maintenance, always take the following steps:
- Turn off the power and make sure all components are disengaged before attempting any maintenance.
- Wear protective clothing, such as gloves and goggles, when servicing any electrical or mechanical parts of a sprayer system.
- Be sure to operate in a well-ventilated area.
- Read all instructions included with any sprayer part that you may be installing or removing for proper maintenance use and safety precautions relating specifically to that item.
- Have an approved fire extinguisher readily available at all times when performing maintenance on your UTV sprayer system for quick reaction in case of a fire emergency situation occurring, as flammable liquids may be present during some service procedures such as tank cleaning and other tasks related to refilling of chemical containers inside the tank compartment area or from transfer tanks outside of tank area.
Gathering tools and supplies
Once you have read the manual, gather all the required tools and supplies to carry out your maintenance plan. You will need a few basic items such as general purpose cleaners, lubricants, and replacement parts. You may also need specialty items such as additional nozzles and/or filters for extended service intervals. Additionally, having needle nose pliers for minor repairs is always a good idea.
It is also recommended that you have rags handy to wipe down surfaces after cleaning or to remove debris from tight spaces. If necessary, cover any exposed wiring with electrical tape or other insulation material before starting work on the sprayer system. Make sure to wear protective equipment when dealing with hazardous materials such as solvents or pesticides; these could be harmful if ingested so take safety precautions!
Finally, always remember to turn off power switches before disassembling the unit and disconnect any fuel lines from the tanks in case there are build-up of unwanted residue inside them.
Maintaining the Pump and Motor
Regular maintenance of your sprayer’s pump and motor is essential in order to ensure that it works properly and efficiently. The following general tips should help you to keep your system running smoothly:
- Make sure the hydraulic fluid is replenished as needed.
- Inspect the high-pressure and low-pressure hoses for any signs of wear or damage, replacing the hoses if necessary.
- Listen for any strange noises coming from the motor, indicating potential problems.
- Analyze the performance of your machine, making adjustments as needed.
- Check all fittings and connections to make sure they are tight and secure.
- Have a professional inspect the tank, boom, pump and motor annually or biennially to ensure proper functioning.
Checking pump oil levels
A crucial element of keeping your UTV sprayer system in good working order is to check and maintain the oil levels in the pump. Pump oil is necessary to lubricate the seals, gaskets, and vital components inside of your pump. Low levels can cause damage to the pump, reduce efficiency, and require necessary repairs that could have been avoided.
To check your oil level, use a dipstick that can be found in the service kit for your specific manufacturer’s model. Insert it into the reservoir’s fill port and observe the level line indicated on the stick. If it is below this line, you need to add oil until it reaches near or above this mark; you always want a little extra for when it begins to heat up or when pressure builds during operation.
You also will want to check for quality- look for thickening or contamination which would indicate impurities or thicker than normal oil level that may need replaced as soon as possible- which bring us to our next step: replacement of faulty sealant and gaskets when needed.
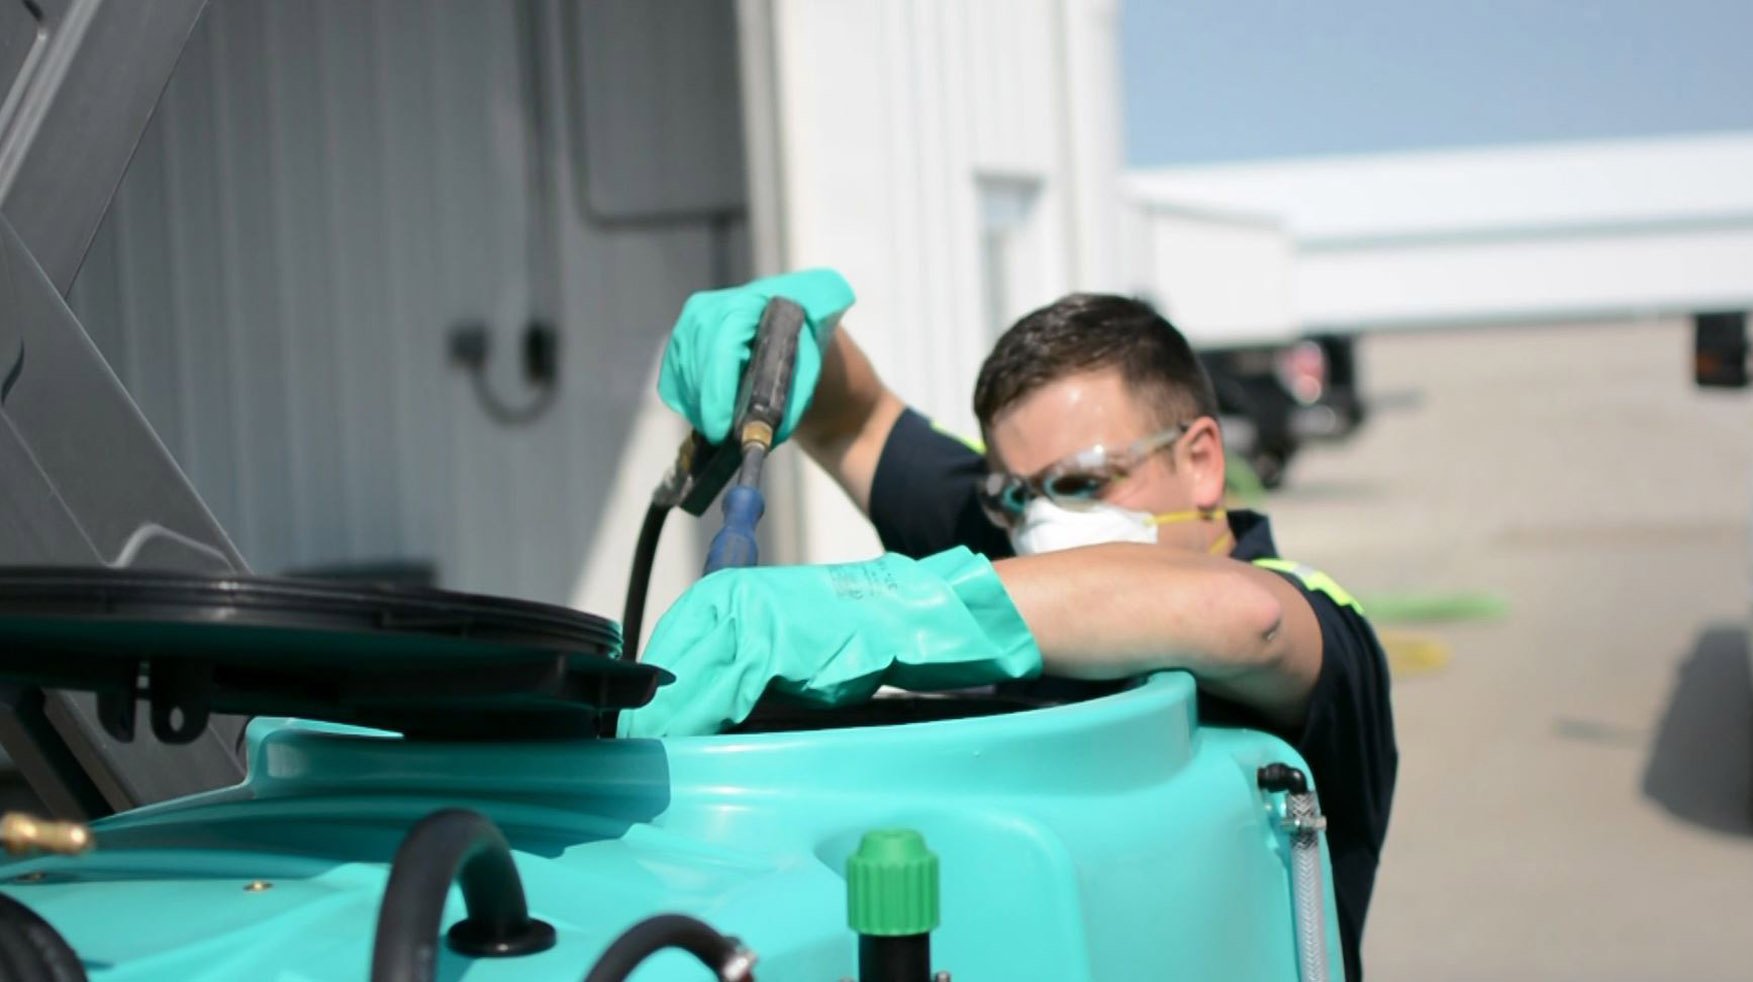
Inspecting pump seals and valves
The pump seals and valves should be inspected regularly to ensure that the system is free of leaks and optimal performance. Pump seals are one of the most important UTV sprayer parts, as they prevent fluid from leaking out and creating a safety hazard. Checking the fuel pump’s seals requires a few steps. First, turn off the power to the fuel pump. Then remove the fuel line at the back of the fuel pump to gain access to the seal. Inspect for any visual indication of wear or damage- look for deep or broad cracks in the seal material or tears in order for rubber gaskets or O-rings. If you find any damage, replace with compatible seals from your manufacturer before reattaching and re-energizing your system.
Valves should also be checked regularly, as improper valve operation can lead to pressure issues inside your system that ultimately can cause poor performance and wasted product due to inefficiencies created by restriction issues in your sprayer components. Adjustment screws are used on various types of valves- these precision screws allow you to fine tune both pressure and flow settings up or down based on desired output settings designated by manufacturer specifications recommended for splitters, regulators, check valves, line breakers, etc…
It is important to use only compatible parts supplied by your UTV sprayer manufacturer when performing maintenance on pumps, hoses & adjustable components associated with pressure control specifically designed for reactivity measurements related on specific tank setups & necessary discharge options available throughout the tank setup process when configuring specialized application requirements per terrain guidelines found within tank configurations set up underneath standard technical specifications listed within manufactures model numbers associated with optimized exhaust & venting requirements while using specific tools designated but not limited to standardized safety equipment which includes but is not limited too dust masks & eye protection goggles… .
Checking and Replacing UTV Sprayer Parts
In order to keep your UTV sprayer working properly, it is important to check and replace parts on a regular basis. The most common parts that need replacing are the following: filters, hoses, seals, and nozzles. It’s also important to identify any potential faulty parts before you start using your system.
Filters: Filters should be checked on a regular basis for clogs, dirt or debris buildup which can impede the flow of solution and be detrimental to overall performance. If you notice decreased pressure or poor coverage while spraying, this is likely a sign of a clogged filter. Be sure to remove the filter and check for blockages before replacing it with a new one.
Hoses: Hose leaks can occur due to aging or cracking, leading to loss of pressure and inefficient spraying solutions. In order to check for leaks in your system’s hose lines, inspect them periodically and ensure they are firmly connected at each end as well as free from cracks or kinks in the line itself. If there is an indication of damage, it may be necessary to replace the damaged section with new tubing before using again.
Seals: Seals become worn or dry over time from extended use in harsh conditions which can lead to leakage from nozzles or other components attached via leaky seals. Inspect such seals regularly for bulging edges or any obvious signs of wear-and-tear that could lead to an inefficient spray job when used again without being serviced or replaced with higher quality material. Additionally, make sure all dynamic seals are correctly seated on their respective connections as incorrect installation could cause further leakage issues down the road.
Nozzles: Nozzles can become blocked due to buildup of solution residue over time. In order keep efficiency levels up while spraying, inspect all nozzles periodically and clean out any debris if necessary by soaking them in vinegar overnight then rinsing them off with fresh water afterwards. It’s also advisable that spare nozzles1are kept available just incase one becomes worn out beyond repair during operation.
1iVAPEZ – How To Keep Your UTV Sprayer Working Properly (2016 November)
Checking pressure gauges and controllers
Pressure gauges and controllers are important components of UTV sprayers. It is important to check them regularly to ensure they are calibrating properly and working as intended. Depending on the specific product, these may be manual or automatic, so it is important to understand how these components work before performing any maintenance.
Manual pressure gauges require regular manual calibration for accuracy. This should be done when the system is running at its highest pressure setting. Similarly, controllers can also require regular calibration checks and adjustments if desired performance is not met. Again, it is best practice to refer to instruction manuals for specific procedures regarding how to calibrate these components for optimal performance.
Automatic pressure gauges and controllers can save time spent on calibration tasks, but even then it can still be helpful to double check that they are functioning properly with visual inspections and audits of their output data or readings whenever possible. Automated systems may still need some light maintenance in order to eliminate dirt build up over time that could impact their accuracy or performance on a long-term basis. Additionally, it is always recommended that all UTV sprayer components such as nozzles and fits should be routinely checked for wear and tear in order to avoid unnecessary downtime or potential risks due to unexpected malfunctions while operating the system with faulty equipment attached or installed onto the UTV itself.

Storage and Winterization
It is important to take measures to properly care for and store your UTV sprayer in order to ensure it continues working properly. Storing and winterizing a UTV sprayer requires the same attention as other agricultural machinery, but the process varies slightly depending on the product.
Storage: -Empty any liquid or chemicals from your tank and discard any hoses or parts that may have become damaged over the season. Empty all tanks and rinse them thoroughly with fresh water. -Clean all filters, strainers, screens and nozzles with soapy water before rinsing them with fresh water. -Lubricate moving parts such as O-rings, valves, hoses and clamps after they have been dried completely. -Check all seals for visible damage such as cracking or tears and replace if necessary.
Winterization: -Fill tank partially full of fresh clean water to prevent freezing during cold temperatures if stored outside by using an antifreeze solution according to manufacturer’s specifications if stored indoors in cold areas.. -Add a fuel stabilizer additive to tank before draining off any leftover fuel to protect engine components when in storage by decreasing its viscosity during periods of nonuse. -Inspect nozzles for clogging due to dirt buildup over time; make sure you open them up so the fluid can flow freely into blocked areas before adding additional cleaning solution if needed.
Disconnect battery from system by disconnecting negative cable first then removing positive cable last — unless otherwise noted –to prevent any accidental sparks that may cause harm during storage; keeping it on a trickle charge every few weeks will help preserve battery life since it won’t be used continuously throughout storage periods between seasons . Follow your manufacturer’s instructions for disconnecting other electrical components like lights or pumps prior to storage as well!
Preparing for storage
If you plan to store your UTV sprayer for an extended period of time, it’s essential to make sure it is properly prepared first. This includes performing regular maintenance and inspecting all connections, hoses, and lines. Here are some additional steps you should take:
- Disconnect and drain the battery. Do not cover the vent tubes to prevent any moisture buildup. Make sure the battery terminals are clean and use a corrosion protector if available.
- Fresh water flush the tank pump regulator, pressure chamber, filters and nozzle assemblies with clean water until they run clear before storage.
- Visually inspect all components for wear or damage. Replace any worn parts as needed or recommended by the manufacturer guidelines.
- Lubricate moving parts in accordance with the manufacturer’s recommended maintenance plan. When possible use a light rust inhibitor to help slow corrosion during storage periods of four months or more by spraying it into crevices in problem areas such as valves, O-rings, hoses and nozzles connections.
- Empty any remaining materials from tanks into a safe containment area then flush out with fresh water after every use – no matter how small – to prevent material residue from building up over time in tanks or plumbing components affecting operation times during spraying season. After flushing out clear water inspect for leaks around seals and valve stems which may have been missed during initial installation or over time can develop due to wear on o-rings etc.. In either case replace these components per manufacturers instructions before storage.
Winterizing the sprayer
As temperatures drop, it’s essential to winterize your UTV sprayer to avoid costly damages from freezing temperatures. Cold weather affects all parts of the sprayer, but particularly nozzles and hoses. To prevent damage, it’s important to protect these parts with a winterization procedure.
Step 1: Make sure the system is drained of all water and liquid left in the reservoir. This includes antifreeze solutions used in cold climates as they will freeze if not completely emptied out of the system.
Step 2: Remove filters and power-wash them thoroughly to ensure they are free from debris or contaminants that could cause clogs or other problems during the winter months when they are not in use. Replace filters with new ones if necessary and reattach them securely after cleaning.
Step 3: Lubricate all hoses and rotating parts with oil (or a product specifically designed for UTV sprayers) to prevent rust or corrosion over the long winter months when your vehicle will go unused for extended periods of time.
Step 4: Once all parts of the system have been inspected, cleaned and lubricated, reconnect them according to manufacturer instructions and reinstall onto your UTV vehicle according to directions provided by the manufacturer. Make sure all connections are secure before proceeding.
Finally, double-check all connections for any signs of leakage before putting away for storage until spring arrives again!
Conclusion
To conclude, UTV sprayers are an invaluable tool for agriculture, landscaping, and many other applications. With proper maintenance and care, you can ensure that your system continues to work effectively for years to come.
Regularly inspect all of the components—particularly the hoses and fittings—for signs of wear or damage. Replace any defective parts immediately and avoid using a sprayer if there is any suspicion of a problem. Additionally, periodically remove any blockages in the system, flush hoses with clean water after long periods of non-use, and terminate cleaning as soon as possible to prevent corrosion.
By following these simple steps you can be assured that your UTV sprayer will remain in good working condition for years to come!
FAQ’S
What is proper sprayer maintenance?
Proper sprayer maintenance involves regular cleaning, checking for leaks, replacing damaged parts, lubricating moving components, and storing the sprayer properly.
How do you maintain a pump sprayer?
To maintain a pump sprayer, clean it after each use, replace worn or damaged parts, lubricate moving components, and store it properly to prevent damage from exposure to the elements.
Why is my sprayer not holding pressure?
A sprayer may not hold pressure due to a damaged or worn pump or seals, a clogged or damaged hose, or a worn or damaged nozzle.
Why do pump sprayers stop working?
Pump sprayers may stop working due to a malfunctioning pump, clogged or damaged hose, worn or damaged nozzle, or insufficient pressure.
What are five functions of a sprayer?
The five functions of a sprayer include applying pesticides, herbicides, and fertilizers, controlling weed growth, watering plants, applying cleaning solutions, and painting or staining surfaces.
What are the safety precautions of sprayers?
The safety precautions for sprayers include wearing protective clothing and equipment, working in well-ventilated areas, avoiding exposure to chemicals, and storing chemicals safely.
What are the 4 main sprayer components?
The four main components of a sprayer are the tank, pump, hose, and nozzle.
What is the working principle of sprayer?
The working principle of a sprayer involves creating pressure within the tank to force the liquid through the hose and out of the nozzle in a fine mist or spray.
What is ideal spraying pressure?
The ideal spraying pressure depends on the type of sprayer and the material being sprayed, but it is typically between 30 and 60 PSI.
What are the procedures for cleaning the sprayer?
The procedures for cleaning a sprayer involve flushing the tank with water, removing and cleaning the nozzle, cleaning the pump and hose, and storing the sprayer properly.
See Also :


