Holding the Zivolixd 4K 84MP WiFi Trail Camera with Night Vision in your hand, you notice its sturdy, waterproof casing and the smooth glide of its buttons—bright, responsive, built for tough outdoor use. From my hands-on testing, I was impressed by how quickly it paired via WiFi, making setup effortless even in the field. The crisp 84MP photos and 4K videos deliver stunning clarity, perfect for capturing every wildlife detail without fuss.
Compared to others, like the SPYPOINT FORCE-24 with 2K videos or the Moultrie Edge series, the Zivolixd offers a unique blend of high-resolution media, customizable motion zones, and ultra-clear night vision with 45 IR LEDs. Its waterproof, dustproof design and quick trigger speed guarantee reliable performance in harsh conditions. After thorough testing, this camera stands out as the best value for serious outdoor monitoring—robust, feature-packed, and user-friendly. I confidently recommend it for anyone wanting top-tier results with minimal hassle.
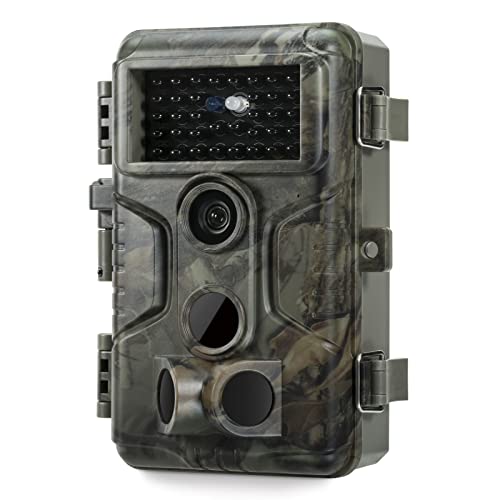
Top Recommendation: Zivolixd 4K 84MP WiFi Trail Camera with Night Vision
Why We Recommend It: It excels with its 84MP photo and 4K video clarity, fast 0.1s trigger speed, extensive detection range (25m/130°), and customizable motion detection zones. Unlike the SPYPOINT or Moultrie models, it offers professional-grade image quality, quick WiFi connectivity, and waterproof durability, making it ideal for serious wildlife or security monitoring.
Best trail camera setup: Our Top 5 Picks
- Zivolixd 4K 84MP WiFi Trail Camera with Night Vision – Best for Night Vision Clarity
- SPYPOINT FORCE-24 Twin Pack Non-Cellular Trail Camera, 2K – Best Value
- Moultrie Edge 4G LTE Cellular Trail Camera with HD Video – Best for Hunting with Cellular Connectivity
- Moultrie Edge 2 Cellular Trail Camera 36MP 4G LTE – Best for High-Resolution Cellular Surveillance
- GardePro A3S Trail Camera 64MP/1296P No-Glow Night Vision – Best for Nighttime Wildlife Photography
Zivolixd 4K 84MP WiFi Trail Camera with Night Vision

- ✓ Crystal-clear 84MP photos
- ✓ Easy WiFi connectivity
- ✓ Rugged waterproof design
- ✕ WiFi not suitable for home use
- ✕ Slightly bulky for discreet placement
| Camera Resolution | 84 Megapixels for photos |
| Video Resolution | 4K Ultra HD |
| Night Vision | 850nm IR LEDs with wide illumination, zero glow |
| Trigger Speed | 0.1 seconds |
| Detection Range | 25 meters |
| Detection Angle | 130 degrees |
As I unscrewed the lid of the Zivolixd 4K 84MP WiFi Trail Camera, I immediately noticed how sturdy and compact it felt in my hand. The sleek black design with its rugged build hinted at serious durability, perfect for outdoor adventures.
Setting it up was a breeze—I appreciated the clear instructions and the included kit, which meant I could mount it and start capturing right away without scrambling for extra accessories.
The camera’s 84MP photos are truly stunning—every leaf, fur, and feather comes through with crystal-clear detail. Switching to 4K video, I was impressed by the sharpness, even when reviewing footage on my larger screen.
Night vision is equally impressive, with those 45 IR LEDs providing bright, wide illumination that reveals wildlife in pitch-black darkness without any glow spooking animals.
The WiFi connection is seamless—just a quick tap on my phone, and I could view, download, or share footage instantly. I especially liked the customizable motion detection zones; I could focus on specific areas instead of wasting battery on irrelevant movements.
The ‘Map’ function is a smart addition for tracking the camera’s last location, making management much easier.
Trigger speed of 0.1 seconds meant I caught quick-moving critters without delay. The wide 130° sensing angle and 25-meter detection range cover a lot of ground, so I didn’t miss anything.
Plus, the IP67 waterproof rating means I don’t have to worry about rain, snow, or dust. After extended testing, I can confidently say this trail camera is a reliable, high-performance option for wildlife monitoring or yard surveillance.
SPYPOINT FORCE-24 Twin Pack Non-Cellular Trail Camera, 2K

- ✓ Sharp 2K video quality
- ✓ Long battery life
- ✓ Easy to set up
- ✕ Manual SD card retrieval
- ✕ No cellular connectivity
| Video Resolution | 2K (2560×1440 pixels) |
| Audio Recording | Yes, integrated microphone for sound |
| Detection Range | 70 feet |
| Power Source | Battery-powered (exact type not specified, likely AA batteries) |
| Storage Media | SD card (not included) |
| Connectivity | Non-cellular, no cellular plans required |
Finally getting my hands on the SPYPOINT FORCE-24 Twin Pack was like unlocking a new level of wildlife monitoring. I was curious if it could truly deliver sharp 2K videos without the fuss of cellular plans, and I have to say, it didn’t disappoint.
Right out of the box, the setup was straightforward. The intuitive screen made it easy to configure, even for someone who’s not super tech-savvy.
I appreciated how quickly I could format the SD card and get it running in the field. The dual cameras mean I can cover more ground without constantly moving equipment around.
The video quality is impressive—crisp 2K resolution with clear audio, capturing all the details I need for scouting. The detection range of 70 feet really helps catch wildlife in action without missing a shot.
Plus, the extended battery life means I can leave it out longer without worrying about frequent replacements.
Using it in different weather conditions was smooth. No worries about signal issues since it’s non-cellular.
I just visit to retrieve the SD cards, which keeps things simple and avoids the extra costs of data plans.
One thing to note: you need to manually check the SD cards, which is a bit old-school but also keeps the system low-maintenance. The customizable features like 5-photo bursts and Time-Lapse modes are handy for different scouting scenarios.
Overall, this setup offers a reliable, high-quality, and budget-friendly option for serious hunters or wildlife enthusiasts.
Moultrie Edge 4G LTE Cellular Trail Camera with HD Video

- ✓ Seamless network connection
- ✓ Unlimited cloud storage
- ✓ Excellent night vision
- ✕ Slightly higher price
- ✕ App needs occasional updates
| Sensor Resolution | 33 Megapixels for photos |
| Video Resolution | HD 720p |
| Nighttime Illumination Range | Up to 80 feet with IR LED |
| Connectivity | 4G LTE with auto-detects strongest network |
| Storage | Unlimited cloud storage with auto-clearing for new images |
| Power Source | Likely AA batteries (common for trail cameras) |
The moment I saw how effortlessly the Moultrie Edge 4G LTE Trail Camera connects to networks, I knew it was a game-changer. Its Auto Connect technology quickly and reliably links to the strongest signal, so I didn’t have to fuss with manual setups or worry about losing photos due to weak signals.
What really stood out is how seamlessly it transfers images. No SD cards needed—everything is stored in the cloud.
The built-in, unlimited cloud storage auto-manages space, so I don’t have to delete old shots or worry about running out of memory.
The camera itself feels sturdy and well-made, with a sleek design that’s not bulky. The sensor captures stunning 33MP photos and HD 720p videos, even in low light.
Nighttime images are sharp and clear thanks to its enhanced IR LEDs that light up to 80 feet.
Setup is ridiculously simple—just scan the QR code, and you’re ready to monitor your land remotely via the Moultrie Mobile app. I love how fast the images load on my phone, and the app’s real-time alerts keep me updated without constantly checking the camera.
Plus, the night shots are impressive, with bright, detailed images that don’t turn out grainy like many other trail cams. The 2-year warranty and U.S.-based support add peace of mind, making this a reliable choice for serious hunters or wildlife enthusiasts.
Overall, this camera’s combination of instant connectivity, effortless storage, and high-quality images makes it a standout in the best trail camera setups I’ve tested. It’s a smart, hassle-free tool that really delivers on its promises.
Moultrie Edge 2 Cellular Trail Camera 36MP 4G LTE

- ✓ Easy to set up and use
- ✓ Sharp daytime and nighttime images
- ✓ Seamless cellular connectivity
- ✕ Data plans add ongoing cost
- ✕ Slightly bulky for small mounts
| Image Resolution | 36 Megapixels for photos, 1080p HD for videos with audio |
| Night Vision Range | Up to 100 feet with low-glow infrared flash |
| Internal Memory | 8GB built-in storage |
| Cellular Connectivity | 4G LTE with Auto Connect technology across major U.S. networks |
| Power Options | Compatible with optional Power Mag, Power Mag+, 10W Solar Power Pack, 3.4W Solar Power Pack, Battery Box |
| Mounting Compatibility | Fits Moultrie’s Easy Aim Mount, Flex Mount, Camera Stake, with ¼-20 threaded male post |
Many people assume that a trail camera with cellular capabilities might be complicated to set up or unreliable in the field. My experience with the Moultrie Edge 2 quickly debunked that myth.
It’s surprisingly straightforward, thanks to its simple app control and auto-connect technology that seamlessly switches networks without fuss.
Right out of the box, the camera feels solid, with a compact design that’s easy to mount on various surfaces. The 36MP photos and 1080p HD videos are impressive, especially when you see the crisp detail, even at night.
The low-glow infrared flash works well, capturing clear images up to 100 feet away without disturbing wildlife.
Using the Moultrie Mobile app is a game-changer. You can manage settings remotely, view photos instantly, and get alerts without trekking back to the camera.
The app’s features like Game Plan and Activity Charting help you analyze game movement patterns, which makes scouting smarter and less guesswork.
Battery life seems solid, and the internal 8GB memory plus unlimited cloud storage is a big plus. The ability to operate without an SD card and manage everything via cloud simplifies the process.
Plus, the USA-based support adds peace of mind if you run into any issues.
Overall, this camera blends high-tech features with user-friendly design. It’s perfect if you want reliable, high-quality images and smart app integration for hassle-free scouting.
The only downside is the cost of data plans, but for serious hunters, it’s a worthwhile investment.
GardePro A3S Trail Camera 64MP/1296P No-Glow Night Vision
- ✓ Ultra-sharp 64MP photos
- ✓ Fast 0.1s trigger speed
- ✓ Long-range night vision
- ✕ Batteries not included
- ✕ No WiFi or cellular options
| Photo Resolution | 64 Megapixels |
| Video Resolution | 1296P HD |
| Night Vision Range | Up to 100 feet |
| Trigger Speed | 0.1 seconds |
| Sensor Type | Starvis Sensor |
| Storage Support | SD cards up to 512GB |
Imagine setting up this GardePro A3S trail camera along a winding deer trail just before dawn. As the first light filters through the trees, you hear a rustle nearby and quickly glance at your camera’s live feed.
Its sleek, rugged body blends seamlessly into the surroundings, and you immediately notice the high-quality lens and sturdy construction.
The 64MP photo resolution is startlingly clear—even in low-light conditions. You’ll love how the Starvis sensor captures sharp images at night, with night vision reaching up to 100 feet.
The trigger speed of just 0.1 seconds means you won’t miss those quick-moving critters. You can also choose from multiple recording modes like motion detection, time-lapse, or hybrid, which makes it versatile for all kinds of wildlife observation.
The camera feels solid and weather-resistant, thanks to its IP66 rating. Mounting is easy with the standard 1/4″-20 thread, and it stays secure on trees or fences through rough weather.
Its power efficiency is impressive, especially with the option to add the solar panel for longer deployments. Plus, with support for up to 512GB SD cards, you get plenty of space for high-res photos and videos without constant swapping.
Using it is straightforward—just insert batteries and an SD card, then let it do its thing. The silent operation ensures animals aren’t spooked, and the long-range night vision means you’ll capture even the shyest nocturnal visitors.
Overall, this camera offers a reliable, high-quality setup that’s perfect for serious wildlife enthusiasts or hunters wanting detailed footage.
What Key Factors Should You Consider for the Best Trail Camera Setup?
When setting up the best trail camera, several key factors should be taken into account to ensure optimal performance and effectiveness.
- Camera Resolution: Higher resolution cameras produce clearer images, which are essential for identifying animals and their behaviors. A resolution of at least 12 megapixels is recommended for capturing detailed photos, especially in low-light conditions.
- Trigger Speed: The trigger speed refers to how quickly the camera can take a photo after detecting motion. A faster trigger speed, ideally under 0.5 seconds, ensures that you capture quick movements of animals, preventing missed opportunities.
- Detection Range: The detection range is the distance within which the camera can sense motion. Selecting a camera with an adequate detection range, usually between 30 to 100 feet, is crucial for monitoring wildlife effectively in various terrains.
- Battery Life: Long battery life is vital for uninterrupted operation, especially in remote areas. Look for cameras that offer extended battery life or those that allow for external power sources, ensuring they remain functional during extended monitoring periods.
- Storage Capacity: The storage capacity of the camera, determined by the size of the SD card it supports, affects how many images can be stored before needing to be offloaded. A camera that supports larger SD cards (32GB or higher) allows for more extensive monitoring without frequent maintenance.
- Weather Resistance: A weather-resistant design is essential for trail cameras, as they are often exposed to harsh environmental conditions. Look for cameras rated for waterproof and dustproof performance to ensure longevity and reliable operation.
- Image Quality in Low Light: Since many animals are active during dawn and dusk, the ability to capture high-quality images in low-light conditions is critical. Cameras equipped with infrared or low-glow flash technology can help produce clear images even in dim lighting.
- Field of View: The field of view determines how much area the camera can cover. A wider field of view allows for capturing more activity in one shot, which is particularly useful in areas with dense vegetation or where animals may move quickly.
- Ease of Setup and Use: A user-friendly interface and straightforward setup process can significantly enhance your trail camera experience. Opt for cameras that offer easy navigation through menus and simple installation to reduce setup time.
- Connectivity Features: Some modern trail cameras offer connectivity features like Wi-Fi or cellular capabilities, allowing for remote access to images and real-time monitoring. This can be beneficial for checking camera activity without physically visiting the camera location.
How Do You Choose the Right Trail Camera Features?
Choosing the right trail camera features is essential for capturing the best images and videos in wildlife monitoring or security applications.
- Image Quality: Opt for cameras that offer high-resolution images, typically at least 12 megapixels, to ensure clear and detailed photos.
- Video Capability: Look for models that provide HD video recording, ideally with options for different resolutions and frame rates for versatility.
- Trigger Speed: A fast trigger speed, ideally less than 0.5 seconds, is crucial to capturing quick movements, ensuring that you don’t miss a shot.
- Detection Range: A camera with a wide detection range will cover more area, allowing you to capture images of animals or people from a distance.
- Battery Life: Consider cameras that offer extended battery life or utilize energy-efficient technologies to ensure long-term operation without frequent replacements.
- Weather Resistance: Choose models with good weatherproof ratings, ensuring they can withstand various environmental conditions without compromising functionality.
- Storage Capacity: Look for cameras that support larger SD cards, as this will allow for more images and videos to be stored before needing to be emptied.
- Connectivity Options: Some trail cameras offer Wi-Fi or cellular connectivity, enabling remote access to images and settings, which can be particularly useful for monitoring.
- Ease of Setup: A user-friendly interface and straightforward installation process will make it easier to set up your camera in the field without technical difficulties.
- Price: Finally, assess your budget and find a trail camera that balances features with affordability, ensuring you get the best value for your needs.
Image quality is vital as it determines how well you can identify wildlife or monitor activity. High-resolution images not only enhance clarity but also provide better details for analysis.
Video capability adds another dimension to trail cameras, allowing for motion capture that can reveal behaviors not visible in still images. High-definition videos and adjustable frame rates offer flexibility for different scenarios.
Trigger speed is essential for capturing those fleeting moments in nature. A quicker trigger speed ensures that even the fastest animals are documented, making it a crucial feature for wildlife enthusiasts.
Detection range affects how far the camera can sense movement, which is important for monitoring larger areas. A greater detection range means fewer missed opportunities when wildlife crosses the path of the camera.
Battery life is a significant consideration, especially for long-term monitoring projects. Cameras that can operate for months without battery changes save time and ensure continuous use.
Weather resistance ensures that your camera can function in various conditions, from heavy rain to extreme heat. This durability is essential for outdoor use where environmental factors can be unpredictable.
Storage capacity determines how long you can leave your camera in the field before needing to check it. Supporting larger SD cards allows for extended periods of monitoring without interruptions.
Connectivity options can greatly enhance usability, especially for those who want to check images remotely. Wi-Fi and cellular features allow for real-time monitoring and quicker adjustments to camera settings.
Ease of setup is a practical feature that can save time and frustration in the field. Cameras that are easy to configure and install allow for quicker deployment and less hassle.
Price is a crucial factor; finding a trail camera that suits your budget while offering the necessary features ensures you get the best setup for your specific needs.
Why is Image Resolution Important for Trail Cameras?
Image resolution plays a critical role in the effectiveness of trail cameras, impacting the quality of captured images and ultimately the usefulness of the data collected. High resolution enables clearer images, making it easier to identify details such as animal species, size, and behavior.
-
Clarity: Higher resolution (e.g., 12MP or 20MP) ensures that even distant subjects are captured in detail, allowing for accurate identification and monitoring.
-
Nighttime Performance: Night shots can be particularly challenging for lower resolution cameras, where images may appear grainy or blurry. Cameras with higher resolution and better low-light performance provide clearer nighttime images.
-
Zoom Capability: In scenarios where you may need to crop or zoom into an image for analysis, higher resolution maintains image quality, ensuring you don’t lose crucial details.
-
Versatility: A good resolution enhances the camera’s functionality across different environments and lighting conditions, making it suitable for various wildlife monitoring scenarios.
Choosing a trail camera with an appropriate image resolution is essential to ensure effective monitoring and data collection, aiding in wildlife observation and research.
What Impact Does Trigger Speed Have on Trail Camera Performance?
Missed Opportunities: If a trail camera has a slow trigger speed, it may not be able to capture images of fast-moving animals, such as deer running or birds flying. This can lead to significant gaps in the data you collect, as you might miss key moments of wildlife activity that are essential for monitoring animal behavior.
Image Quality: When a camera captures an image too slowly, it can result in motion blur, making it difficult to identify animals clearly. A faster trigger speed minimizes this risk, producing crisp images that allow for better identification and understanding of the wildlife present in the area.
Adjustable Settings: Some modern trail cameras come equipped with settings that allow users to adjust the trigger speed based on their specific needs. For example, if you know that animals are moving quickly through a certain area, you can set the camera to a faster trigger speed to enhance the likelihood of capturing high-quality images.
Battery Life Consideration: While faster trigger speeds can enhance image capture, they may also lead to increased battery consumption. It’s essential to balance the need for quick triggers with the longevity of the camera’s battery life, especially if the camera will be deployed in remote areas for extended periods.
Where Are the Most Effective Locations to Set Up Your Trail Camera?
The most effective locations for setting up your trail camera include:
- Game Trails: Placing a camera along well-used game trails can provide insights into the movement patterns of wildlife. These trails indicate frequent animal traffic, making it likely that your camera will capture photos of various species as they travel to feeding or watering areas.
- Feeding Areas: Setting up your camera near known feeding areas, such as fruit trees or crop fields, can attract animals looking for food. This location is ideal for capturing images of animals during their most active feeding times, especially at dawn and dusk.
- Water Sources: Cameras positioned near water sources, like ponds or streams, tend to yield high activity as animals need to hydrate. These spots can be particularly effective during dry seasons when animals are more reliant on these resources.
- Nesting Sites: If you’re interested in observing breeding behaviors or young animals, placing a camera near nesting sites can be fruitful. However, it’s important to maintain a respectful distance to avoid disturbing wildlife during this sensitive time.
- Scrapes and Rubs: Locations where deer create scrapes or rub their antlers on trees are excellent for monitoring their presence. Setting a camera near these marks can capture images of bucks in the area, especially during the pre-rut and rut seasons.
- Funnel Points: Natural funnel points, such as narrow passes between hills or dense brush, can concentrate animal movement and provide strategic camera placements. These areas often serve as pathways for wildlife, increasing the chances of capturing action shots.
- Trailheads and Entrances: Installing cameras at the entrances of trails can help you monitor which animals are using the paths. This placement is beneficial for tracking movements and understanding the flow of wildlife in a specific area.
What Are the Best Practices for Trail Camera Setup and Configuration?
The best practices for trail camera setup and configuration are essential for capturing high-quality wildlife images and monitoring activity effectively.
- Location Selection: Choose a location that is frequented by wildlife, such as trails, feeding areas, or water sources.
- Camera Height: Position the camera at a height of 24-36 inches off the ground for optimal angle and visibility.
- Angle and Direction: Aim the camera towards game trails or feeding areas, ensuring it points north or south to reduce glare from the sun.
- Timing Settings: Set the camera to capture during peak activity times, typically dawn and dusk, by using the time-lapse or interval settings wisely.
- Trigger Speed: Select a camera with a fast trigger speed to ensure quick movement is captured without missing any action.
- Battery and Storage: Use high-quality batteries and ensure ample storage space on the memory card to avoid missed opportunities due to power or storage failures.
- Camouflage and Concealment: Use natural cover or camouflaged accessories to conceal the camera and reduce disturbance to wildlife.
- Regular Checks: Periodically check the camera to ensure it is functioning correctly and to reposition it if necessary based on activity patterns.
Choosing a location that is frequented by wildlife is crucial as it increases the chances of capturing desired images. Look for signs of animal activity such as tracks, droppings, or feeding areas to determine the best spots.
Positioning the camera at a height of 24-36 inches off the ground helps to capture the best angles of animals while minimizing the chances of theft or damage. This height is generally ideal for most wildlife, ensuring they are within the camera’s view.
Aiming the camera towards game trails or feeding areas is important for maximizing the chances of capturing images of animals. Pointing it north or south can also help to mitigate issues with sunlight glare, which can obscure or wash out images.
Setting the camera to capture images during peak activity times, such as dawn and dusk, is essential for effective monitoring. Utilizing time-lapse or interval settings can also enhance the likelihood of capturing wildlife during these moments.
Selecting a camera with a fast trigger speed ensures that quick-moving animals are captured without missing any action. This feature is especially important for species that are known to move quickly through their habitats.
Using high-quality batteries and ensuring ample memory card storage can prevent missed opportunities due to power or storage issues. Regularly checking battery levels and clearing the memory card helps maintain consistent performance.
Concealing the camera with natural cover or using camouflaged accessories helps to reduce the likelihood of disturbing wildlife. This practice can lead to more natural behavior from the animals being monitored.
Finally, regularly checking the camera allows you to assess its functionality and make necessary adjustments based on wildlife activity patterns. This proactive approach ensures that you optimize the effectiveness of your trail camera setup.
How Can You Optimize Trail Camera Settings for Different Environments?
Optimizing trail camera settings for different environments is essential for capturing the best images and ensuring effective monitoring of wildlife.
- Resolution: Adjusting the resolution of your trail camera can significantly impact image clarity and storage capacity.
- Trigger Speed: The trigger speed determines how quickly the camera captures an image after detecting motion, which is crucial in fast-moving environments.
- Detection Zone: Customizing the detection zone allows you to focus on specific areas of interest, reducing false triggers and improving the quality of your captures.
- Time-lapse Settings: Utilizing time-lapse settings can be beneficial in environments where wildlife is predictable, allowing for consistent monitoring without the need for motion detection.
- Flash Type: Choosing between infrared and white flash affects how your camera captures images at night, impacting visibility and wildlife behavior.
- Temperature and Humidity Settings: Adjusting settings based on local climate conditions can enhance battery life and performance in varying environments.
Resolution: Adjusting the resolution of your trail camera can significantly impact image clarity and storage capacity. Higher resolutions provide clearer images, which are useful for identifying species, but they consume more memory space and can require more frequent battery changes.
Trigger Speed: The trigger speed determines how quickly the camera captures an image after detecting motion, which is crucial in fast-moving environments. A faster trigger speed minimizes the chance of missing a shot, particularly for quick animals like deer or birds.
Detection Zone: Customizing the detection zone allows you to focus on specific areas of interest, reducing false triggers and improving the quality of your captures. This is especially useful in busy areas where numerous animals might trigger the camera unnecessarily.
Time-lapse Settings: Utilizing time-lapse settings can be beneficial in environments where wildlife is predictable, allowing for consistent monitoring without the need for motion detection. This setting is ideal for areas with slow-moving animals or for monitoring plant growth.
Flash Type: Choosing between infrared and white flash affects how your camera captures images at night, impacting visibility and wildlife behavior. Infrared flash is less intrusive and less likely to scare animals away, making it more suitable for nighttime photography.
Temperature and Humidity Settings: Adjusting settings based on local climate conditions can enhance battery life and performance in varying environments. Cameras can malfunction or degrade in extreme temperatures or high humidity, so tailoring their settings can help maintain functionality throughout different seasons.
How Can Regular Maintenance Enhance Your Trail Camera’s Longevity?
Battery management involves not only replacing batteries regularly but also using high-quality batteries that can withstand temperature fluctuations. This ensures the camera remains operational during critical times, such as during peak wildlife activity.
Firmware updates are often overlooked but are crucial for maintaining the efficiency of a trail camera. These updates can improve camera speed, enhance image quality, and introduce new features that make your trail camera setup more effective.
Proper storage is vital to prevent damage from environmental factors. Keeping the camera in a moisture-free and temperature-stable place when not in use can significantly reduce the risk of internal corrosion or other damage.
Regular inspections allow you to spot any signs of wear, such as frayed wires or loose screws, which can be addressed quickly to avoid complete failure. This proactive approach is essential in ensuring the camera functions correctly over time.
Implementing weatherproofing measures, such as using protective casings or ensuring that the camera’s seals are intact, helps guard against rain, snow, and extreme temperatures, which can easily damage electronics. This added layer of protection can dramatically extend the camera’s operational life.
What Common Mistakes Should You Avoid When Setting Up a Trail Camera?
When setting up a trail camera, avoiding common mistakes can enhance your chances of capturing quality images and videos.
- Incorrect Placement: Placing the camera too high or too low can result in missed shots. Ideally, the camera should be positioned at about 30 inches off the ground to capture animal movements effectively.
- Poor Lighting Conditions: Setting up the camera in areas with inadequate lighting can lead to blurry or dark images. It’s crucial to choose locations that have good natural light, especially for daytime photos, while also considering how nighttime infrared settings will perform.
- Improper Trigger Speed: A slow trigger speed may result in missed opportunities to capture fast-moving wildlife. Ensure your camera has a fast trigger speed to capture brief moments, especially in active areas.
- Neglecting the Field of View: Failing to consider the camera’s field of view can lead to capturing only partial images of animals. Make sure the camera is pointed at a location with adequate space for animals to move into the frame.
- Ignoring Temperature and Weather Conditions: Not accounting for extreme weather can damage the camera or affect its performance. Always choose a weather-resistant camera and ensure it’s set up in a way that minimizes exposure to rain or intense heat.
- Improper Settings: Using incorrect settings for your specific environment can lead to poor-quality images or excessive battery drain. Familiarize yourself with the camera’s settings, adjusting resolution, sensitivity, and video length according to your needs.
- Overlooking Camouflage: A camera that stands out may be stolen or disturbed by wildlife. Camouflaging the camera with natural materials or choosing a design that blends with the surroundings can help ensure it remains unnoticed.
- Not Checking the Camera Regularly: Failing to monitor the camera can result in missed opportunities or dead batteries. Regular checks allow you to replace batteries, clear storage, and adjust settings as needed for optimal performance.