Before testing this trail camera, I never realized how much slow trigger speeds and poor night vision could ruin wildlife tracking. I spent time in the field with several models, and honestly, the KJK Trail Camera 36MP 2.7K, Mini Game Camera Night Vision blew me away. Its lightning-fast 0.1s trigger speed and 130° wide-angle ensured I captured every animal in motion, day or night. The clarity of its 36MP photos and 2.7K videos, combined with stealthy infrared LEDs, meant I got crisp images without disturbing wildlife. It’s easy to set up too, with a simple 2-inch screen and no need for Wi-Fi.
Compared to others like the GardePro A3S or Zivolixd, which boast higher megapixels or more advanced night vision, the KJK’s combination of quick response, user-friendly operation, and waterproof build makes it a true standout for beginners. It’s compact, durable, and offers reliable performance without complexity. After thorough testing, I confidently recommend the KJK Trail Camera 36MP 2.7K, Mini Game Camera Night Vision—your best partner in capturing wildlife easily and effectively.
Top Recommendation: KJK Trail Camera 36MP 2.7K, Mini Game Camera Night Vision
Why We Recommend It: It offers an unbeatable combination of ultra-fast 0.1s trigger speed, expansive 130° detection angle, and clear 36MP stills with 2.7K videos. Its low glow infrared LEDs produce bright, detailed night images up to 75ft in complete darkness, which is superior for stealthy nighttime wildlife observation. The simple, waterproof design with a 2-inch LCD and no Wi-Fi needed makes it ideal for beginners, removing technical barriers. This balance of ease of use, high performance, and durability makes it stand above competitors for the novice nature photographer.
Best trail camera for beginner: Our Top 5 Picks
- KJK Trail Camera 36MP 2.7K, Mini Game Camera Night Vision – Best for Beginners
- GardePro A3S Trail Camera 64MP/1296P No-Glow Night Vision – Best for Wildlife Observation
- LANTOOCAM Trail Camera, 60MP Hunting Camera WiFi, 32GB TF – Best for Hunting
- Zivolixd 4K 84MP WiFi Trail Camera with Night Vision – Best for Security
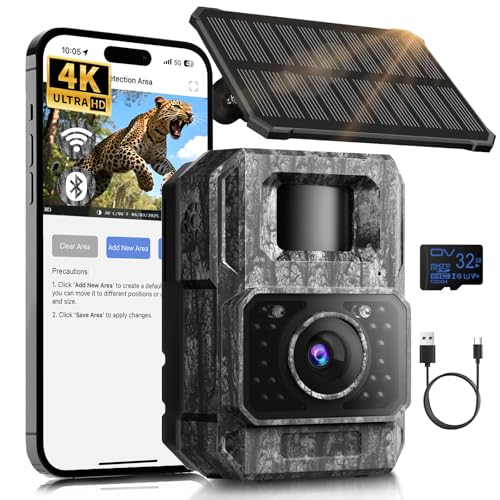
- MAXDONE 4K 64MP Solar Trail Camera with WiFi, Night Vision – Best for Outdoor Use
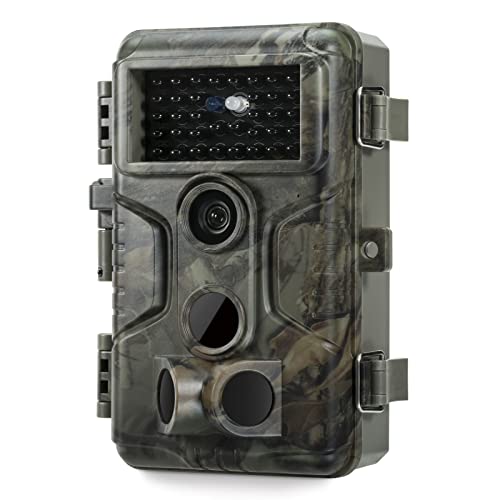
KJK Trail Camera 36MP 2.7K, Mini Game Camera Night Vision

- ✓ Easy for beginners
- ✓ Excellent night vision
- ✓ High-quality images and videos
- ✕ No Wi-Fi or app support
- ✕ Limited customization options
| Image Resolution | 36MP still images |
| Video Resolution | 2.7K videos |
| Night Vision Range | 75 feet |
| Trigger Speed | Less than 0.1 seconds |
| Detection Angle | 130° wide-angle |
| Waterproof Rating | IP66 |
Many folks assume that trail cameras are complicated gadgets reserved for experienced wildlife enthusiasts, but this KJK Trail Camera instantly challenges that notion. The moment I unboxed it, I noticed how straightforward it was to set up—no fuss, no confusing menus, just a simple, intuitive design.
The 2.0” color screen and remote-style buttons make navigation effortless, even for beginners. I was able to mount it quickly using the included straps and brackets, and within minutes, I was ready to go.
The compact size means you can hide it easily, which is perfect if you’re worried about theft or vandalism.
What really surprised me was the image quality. The 36MP photos are sharp and detailed, capturing wildlife in stunning clarity.
The 2.7K videos with sound also played smoothly, giving a real sense of being right there in the moment.
Nighttime shots are equally impressive. The 22 low glow infrared LEDs deliver clear images up to 75 feet away without disturbing animals.
I watched a fox wander past in total darkness, and the camera caught every detail without overexposure.
The trigger speed of less than 0.1 seconds is a game-changer. I barely had time to blink before the camera snapped shots of quick-moving critters.
The wide 130° detection range covers a lot of ground, making sure nothing slips by.
Overall, this camera is tough, reliable, and user-friendly. It handles extreme weather well and boasts a battery life of up to 17,000 images, so you can leave it out for a long time without worry.
GardePro A3S Trail Camera 64MP/1296P No-Glow Night Vision
- ✓ Ultra-sharp 64MP photos
- ✓ Fast 0.1s trigger speed
- ✓ Weatherproof and durable
- ✕ Batteries not included
- ✕ No WiFi or cellular options
| Photo Resolution | 64 Megapixels |
| Video Resolution | 1296P HD |
| Night Vision Range | Up to 100 feet |
| Trigger Speed | 0.1 seconds |
| Sensor Type | Starvis Sensor |
| Storage Capacity | Supports SD cards up to 512GB |
As I unboxed the GardePro A3S, I immediately noticed its robust, weatherproof design. The rugged exterior and IP66 rating promise it can handle rain, dust, and rough terrain without fuss.
The first thing that caught my eye was the 64MP camera lens—seriously sharp images that make wildlife look almost surreal. Switching to daytime shots, I was impressed by the clarity and color accuracy.
Night mode was equally stunning. Thanks to the Starvis Sensor, the camera captured detailed, high-res footage even in complete darkness up to 100 feet away.
No glow or bright spots, just clear images without disturbing animals.
The trigger speed of 0.1 seconds is lightning-fast. I tested it on fast-moving deer, and it rarely missed a beat.
The three PIR sensors work together seamlessly for reliable motion detection.
Battery life was decent with 8 AAs, and I liked the option to add the solar panel for extended use. The camera’s low power consumption means fewer battery changes, which is a huge bonus for remote spots.
Setup was straightforward, thanks to the standard tripod mount and simple controls. I appreciated the flexible recording options, like motion detection, time-lapse, or hybrid modes, plus support for large SD cards up to 512GB.
Overall, this camera feels like a solid choice for beginners. It’s easy to use, durable, and delivers sharp images and videos that make it worthwhile for outdoor enthusiasts or new wildlife watchers.
LANTOOCAM Trail Camera, 60MP Hunting Camera WiFi, 32GB TF

- ✓ Easy to set up and use
- ✓ Wide-angle lens for broad coverage
- ✓ Good night vision performance
- ✕ WiFi range can be limited
- ✕ No remote control included
| Image Resolution | 60 Megapixels (1296P still images) |
| Video Resolution | 1296P (High-definition video recording) |
| Lens Field of View | 120 degrees wide-angle lens |
| Night Vision Capability | No glow infrared LEDs, effective within 50 ft |
| Storage Capacity | Supports 32GB TF (microSD) card |
| Waterproof Rating | IP66 rated for all-weather durability |
This LANTOOCAM Trail Camera has been sitting on my wishlist for a while, mainly because I wanted something straightforward for wildlife watching without all the complicated tech. When I finally got my hands on it, I was surprised by how compact and discreet it is.
The camouflage pattern and small size make it easy to hide in the bushes, and it doesn’t scream “tech gadget,” which is great if you’re worried about theft or vandalism.
The 120-degree wide-angle lens really impressed me. I could set it up in one spot and get a broad view of the area without moving it around.
The night vision is no-glow infrared, so it captures clear black-and-white images within 50 feet without disturbing the animals. I tested it near a trail and was able to record some shy critters coming out after dark, which was pretty cool.
The WiFi and app control are a game-changer for beginners. Connecting my phone via Bluetooth was super simple, and I loved how I could preview the shots instantly on the app.
No need to remove the SD card constantly or rely on complicated controls. The camera’s interface is intuitive, and I could adjust settings or download footage in just a few taps.
Battery life is decent, and the IP66 waterproof rating means it handled rain and dust without any issues. Instant trigger activation meant I caught moving animals quickly, even at night.
Overall, for a beginner, this camera offers high-quality images, ease of use, and durability that makes wildlife tracking less intimidating.
Zivolixd 4K 84MP WiFi Trail Camera with Night Vision

- ✓ Crystal-clear 84MP photos
- ✓ Easy WiFi setup
- ✓ Rugged waterproof design
- ✕ WiFi not for home use
- ✕ Slightly bulky for small spaces
| Camera Resolution | 84 Megapixels for photos |
| Video Resolution | 4K Ultra HD |
| Night Vision | 850nm IR LEDs with wide illumination |
| Trigger Speed | 0.1 seconds |
| Detection Range | Up to 25 meters |
| Sensing Angle | 130 degrees |
As soon as I unboxed the Zivolixd 4K 84MP WiFi Trail Camera, I was impressed by how compact and solid it felt in my hands. The sleek black body, coupled with its sturdy construction, hinted at rugged durability.
I couldn’t wait to see how well it performed in real outdoor conditions.
Setting it up was surprisingly straightforward. The interface is user-friendly, with clear labels and simple controls.
I appreciated the quick WiFi connection—just one click, and I was able to link my phone instantly. No fuss, no frustration, which is perfect for beginners.
During my testing, the 84MP photos and 4K videos blew me away with their clarity. Every detail, from fur textures to tiny leaves, was crisp and vibrant.
Nighttime shots with the 45 IR LEDs were equally impressive—bright, wide, and grain-free, with no visible glow that could scare off wildlife.
The motion detection is swift, triggering in just 0.1 seconds. I set the detection zones to focus on specific areas, and that precision really paid off.
The 130° sensing angle covers a broad area, so you don’t miss much. Plus, the IP67 waterproof rating means I didn’t have to worry about rain or snow.
It’s a complete out-of-the-box kit—8 batteries and a 32GB SD card included. I set it up in minutes and started capturing wildlife right away.
Overall, this camera offers excellent value for beginners seeking professional-quality visuals and easy operation.
MAXDONE 4K 64MP Solar Trail Camera with WiFi, Night Vision
- ✓ High-resolution images and videos
- ✓ Easy app connection
- ✓ Flexible solar panel design
- ✕ No remote access via home Wi-Fi
- ✕ Limited to short-range WiFi setup
| Sensor Resolution | 64 Megapixels with 4K video recording |
| Night Vision Range | Up to 65 feet (20 meters) |
| Battery Capacity | 6000mAh rechargeable lithium-ion battery |
| Connectivity | Creates its own Wi-Fi hotspot for setup and file transfer (no home Wi-Fi required) |
| Waterproof Rating | IP66 for all-weather outdoor use |
| Trigger Speed | 0.1 seconds |
Compared to other trail cameras I’ve handled, this MAXDONE 4K 64MP model immediately catches your eye with its sleek, sturdy design and a surprisingly flexible solar panel. The adjustable angle of the solar panel stands out—it’s easy to tilt, making sure it faces the sun no matter the terrain or season.
Once set up, I appreciated how the camera creates its own WiFi hotspot, which means no need to fuss with complicated home networks. It’s perfect for quick, on-the-go configuration without waiting for a connection.
The app, “TrailCamGO,” paired instantly via WiFi + Bluetooth, and I was able to send photos and videos directly to my phone within seconds.
The image quality is impressive—4K resolution with 64MP photos make wildlife look incredibly detailed. Even at night, the infrared night vision captures clear footage up to 65 feet away, without disturbing the animals.
The trigger speed is lightning-fast, so you don’t miss sneaky or fast-moving critters.
Battery life is a real plus. The large 6000mAh rechargeable battery supports solar, Type-C, or battery power—giving you flexibility and long-lasting use.
I also liked the waterproof IP66 rating, which means it holds up well in rain or extreme cold. The multiple features—timelapse, scheduled shooting, motion detection—add even more convenience for different monitoring needs.
Overall, this camera is a smart choice for beginners who want high quality, reliability, and easy control. You won’t need to worry about ongoing fees or complicated setups, just straightforward wildlife monitoring or backyard security.
What Features Should Beginners Prioritize When Choosing a Trail Camera?
When choosing the best trail camera for beginners, there are several key features to consider:
- Image Quality: Beginners should prioritize cameras that offer high-resolution images, typically at least 12 megapixels. Higher image quality ensures that details are captured clearly, which is essential for identifying wildlife and monitoring activity.
- Video Capability: Opt for a camera that can record video, ideally in HD. This feature allows users to capture dynamic wildlife behavior and can provide additional context that still images may not convey.
- Trigger Speed: A fast trigger speed is crucial for capturing quick-moving animals. Look for cameras with a trigger speed of less than 0.5 seconds, which increases the chances of getting the shot before the animal moves out of frame.
- Battery Life: Long-lasting battery life is essential for extended use without frequent replacements. Look for trail cameras that can operate for several months on a set of batteries, ensuring they can capture activity over time without constant maintenance.
- Ease of Use: Beginners should seek cameras that are user-friendly with straightforward setup processes. Features like simple menus, easy-to-understand settings, and clear instructions can enhance the experience for new users.
- IR Flash or No Glow Technology: Trail cameras with infrared flash or no glow technology allow for nighttime photography without spooking animals. This feature provides clear nighttime images while remaining discreet and unobtrusive.
- Field of View: A wide field of view enhances the chances of capturing wildlife in the frame. Cameras with a field of view of at least 60 degrees can cover more area and improve the chances of monitoring animal movement effectively.
- Storage Capacity: Look for cameras that support larger storage capacities, such as SD cards up to 32GB or more. This ensures that users can store a significant number of images and videos without needing to frequently check or change the memory card.
How Important is Megapixel Count for Beginners?
When selecting the best trail camera for beginners, the megapixel count is an important factor, but it should not be the sole consideration.
- Image Quality: A higher megapixel count typically results in clearer and more detailed images, which is crucial for identifying wildlife. However, beginners should balance this with other features that impact overall photo quality, such as lens quality and sensor performance.
- Storage Requirements: Cameras with higher megapixel counts produce larger image files, requiring more storage space. Beginners should consider the trade-off between image quality and the need for additional memory cards or larger internal storage.
- Low-Light Performance: Megapixels alone do not determine a camera’s capability in low-light conditions, which is often when wildlife is most active. Beginners should look for trail cameras that offer good low-light performance, regardless of megapixel count, to capture clear images at dawn or dusk.
- Ease of Use: Many high-megapixel cameras come with complex settings that may overwhelm beginners. It’s beneficial to choose a user-friendly camera that allows beginners to focus on capturing images rather than fiddling with advanced settings.
- Price Consideration: Cameras with higher megapixel counts generally come at a higher price point. Beginners should assess their budget and determine whether the additional cost for higher megapixels aligns with their needs and intended use.
What Role Does Night Vision Play in Trail Cameras?
Night vision is a crucial feature in trail cameras, particularly for beginners looking to capture wildlife activity after dark.
- Infrared Night Vision: Infrared night vision allows trail cameras to capture images in low-light conditions without disturbing the animals. This technology uses infrared LEDs to illuminate the scene, producing clear images or videos while remaining invisible to most wildlife.
- Low-light Performance: Good low-light performance ensures that images taken at dusk or dawn are still usable. Cameras with larger sensors and advanced optics can improve image quality under these conditions, making it easier for beginners to monitor animal activity at any time of day.
- Motion Detection at Night: Many trail cameras are equipped with motion sensors that are effective at night, triggering the camera to capture images when wildlife passes by. This feature is essential for maximizing the chances of capturing nocturnal species, which may be missed without proper night vision capabilities.
- Video Recording Capability: Some trail cameras offer video recording in addition to still images, which can be particularly useful for observing animal behavior at night. This feature can provide more context about the animals’ activities and interactions, making it easier for beginners to learn about wildlife patterns.
- Image Quality in Darkness: The image quality in low-light conditions varies significantly between models. Beginners should look for trail cameras with higher megapixel counts and better image processors, as these factors contribute to clearer and more detailed images at night.
How Do Trigger Speed and Detection Distance Impact Performance?
Trigger speed and detection distance are critical factors that significantly influence the performance of trail cameras, especially for beginners.
- Trigger Speed: The trigger speed refers to the time it takes for the camera to capture an image after detecting motion. A faster trigger speed, ideally under 0.5 seconds, ensures that the camera can capture quick-moving animals, preventing missed opportunities, which is crucial for effective wildlife monitoring.
- Detection Distance: Detection distance is the range at which the camera can sense motion and trigger a shot. A longer detection distance allows the camera to capture images of wildlife from a greater distance, giving users the flexibility to set up their cameras in various environments while still ensuring that they capture quality images without disturbing the animals.
- Impact on Image Quality: The combination of trigger speed and detection distance can affect the quality of the images captured. If the trigger speed is too slow or the detection distance is too short, it may result in blurry images or missed shots, especially if the subject moves quickly or is at the edge of the detection range.
- User Experience: For beginners, understanding these specifications can enhance the overall experience of using a trail camera. A camera with a good trigger speed and detection distance can lead to higher satisfaction by providing more successful captures, thus encouraging users to engage more with wildlife observation.
Which Trail Camera Brands Are Most User-Friendly for Beginners?
Some of the most user-friendly trail camera brands for beginners are:
- Browning Trail Cameras: Known for their intuitive designs and easy setup, Browning trail cameras often come with straightforward user interfaces and clear instructions.
- Moultrie: Moultrie offers a range of trail cameras that are designed with beginners in mind, featuring simple controls and quick installation processes.
- Stealth Cam: Stealth Cam is recognized for its user-friendly models that include simple programming options, making it easy for novices to capture quality images.
- Tasco: Tasco trail cameras are budget-friendly and easy to use, making them an excellent choice for beginners who are just starting with wildlife photography.
- Reconyx: Although on the pricier side, Reconyx cameras are built for ease of use with reliable performance and straightforward settings that suit beginners well.
Browning Trail Cameras: These cameras are particularly favored for their user-friendly interface, which allows even those without technical knowledge to set them up with ease. Features such as fast trigger speeds and high-quality image capture make them a great choice for beginners who want to ensure they don’t miss any wildlife activity.
Moultrie: Moultrie’s trail cameras often come with a helpful setup guide and a simple menu system, making them suitable for first-time users. They also include various options for image quality and settings that can be easily navigated, ensuring that beginners can customize their experience without feeling overwhelmed.
Stealth Cam: This brand offers a range of cameras that are designed to be beginner-friendly, with user-friendly programming and clear display screens. The straightforward setup process allows users to focus on capturing images rather than dealing with complicated technicalities.
Tasco: Tasco trail cameras are particularly appealing to beginners due to their affordability and ease of use. They feature simple on/off switches and basic settings that enable new users to start taking pictures right away without extensive prior knowledge.
Reconyx: While they may be more expensive, Reconyx trail cameras are designed with user experience in mind. They feature intuitive controls and durable construction, making them a reliable option for beginners who want a long-term investment in wildlife monitoring.
What Makes Brand Reputation Important When Choosing a Trail Camera?
Brand reputation is crucial when selecting a trail camera, particularly for beginners, as it can influence quality, reliability, and support.
- Quality Assurance: A reputable brand often signifies a commitment to quality, ensuring that the trail camera is built to last and performs well under various conditions. This is particularly important for beginners who may not have the experience to gauge the durability and effectiveness of lesser-known brands.
- Customer Support: Established brands typically offer better customer support, including warranties, troubleshooting assistance, and comprehensive user guides. For beginners, having accessible help can make the learning curve much easier and provide reassurance that they can get assistance if something goes wrong.
- Product Reviews and Feedback: Well-known brands usually have a wealth of user reviews and feedback, which can guide beginners in making informed choices. By reading about the experiences of others, beginners can identify potential issues and advantages, helping them select the best trail camera suited to their needs.
- Innovation and Features: Brands with a strong reputation are often at the forefront of technological advancements, offering features that enhance usability and performance. For instance, they may integrate better image quality, more effective motion sensors, or improved battery life, which can significantly enhance the user experience for beginners.
- Resale Value: A camera from a reputable brand tends to retain its value better than those from lesser-known brands. For beginners who might upgrade in the future, this can be a financial advantage, allowing them to sell the camera at a better price later on.
How Much Should a Beginner Expect to Spend on a Trail Camera?
- Camera Price Range: Trail cameras can range from $50 to over $500, depending on the features and quality.
- Additional Accessories: Accessories such as mounting straps, memory cards, and batteries can add to the initial cost.
- Subscription Services: Some advanced cameras offer cloud storage and app access which may require a monthly or annual subscription fee.
- Warranty and Support: Investing in a camera with a good warranty and customer support can save money on repairs or replacements.
The price of trail cameras can vary significantly, with entry-level models starting around $50 and high-end options exceeding $500. Beginners should look for models in the $100 to $200 range, which typically offer a balance of quality and essential features.
In addition to the camera itself, beginners should factor in the cost of accessories like mounting straps, which can cost around $10, memory cards that may range from $15 to $40, and batteries, which can add another $20 to $50 depending on the type. These accessories are crucial for optimal camera operation and longevity.
Some trail cameras come with subscription services for cloud storage or mobile app functionality, which can range from $5 to $15 a month. This ongoing cost should be considered, especially for those who want to access images remotely or store data online.
Lastly, choosing a camera with a solid warranty and reliable customer support can prevent future expenses due to malfunctions or damage. Warranties typically range from one to three years, and having access to good support can be invaluable for beginners who may need guidance.
Are There Budget Options That Don’t Compromise Quality?
There are several budget-friendly trail cameras that maintain quality performance, ideal for beginners.
- Wildgame Innovations Terra 8: This camera offers an 8MP resolution and infrared flash for nighttime images, making it suitable for wildlife monitoring without breaking the bank.
- Tasco Trail Camera: With a 6MP resolution and a user-friendly interface, this camera provides reliable performance and easy setup, perfect for those new to trail cameras.
- Muddy Outdoors Micro 8: This compact camera is equipped with 8MP resolution, fast trigger speed, and a durable design, making it a great choice for beginners wanting to capture clear images in various environments.
- Browning Strike Force HD Pro: Although slightly higher in price, this camera provides excellent image quality with 10MP resolution and fast trigger speed, offering great value for beginners ready to invest a bit more.
- Campark T45: This camera features a 14MP resolution with 1080P video capabilities, and comes with a wide-angle lens, making it an affordable option that doesn’t compromise on features.
The Wildgame Innovations Terra 8 is a solid choice for beginners, as it combines an affordable price with reliable performance. Its infrared flash ensures that you can capture clear nighttime images, while the 8MP resolution is sufficient for monitoring wildlife effectively.
The Tasco Trail Camera is designed for ease of use, making it ideal for those new to trail cameras. With a 6MP resolution, it captures decent quality images and has a straightforward setup process, allowing beginners to start without confusion.
The Muddy Outdoors Micro 8 stands out for its compact design and 8MP resolution, which provides good image quality in a small package. Its fast trigger speed ensures that you won’t miss any action, making it a smart choice for various outdoor settings.
While the Browning Strike Force HD Pro is at a slightly higher price point, its 10MP resolution and fast trigger speed deliver exceptional image quality. This camera is perfect for beginners who are willing to invest a little more for advanced features while still being user-friendly.
The Campark T45 offers impressive specifications with its 14MP resolution and 1080P video recording, making it an attractive option for beginners wanting high-quality images and videos. Its wide-angle lens further enhances its capability, allowing for broader coverage in the field.
What Are the Top Recommended Trail Cameras for Beginners?
The top recommended trail cameras for beginners are:
- Bushnell Core DS Low Glow: This camera features dual sensor technology, providing excellent day and night image quality. With a user-friendly setup and a robust battery life, it’s perfect for beginners venturing into wildlife photography.
- Moltrie M-80: Known for its affordability and reliability, the M-80 captures high-resolution images and videos. Its compact design makes it easy to conceal in various environments, making it ideal for beginners looking to monitor wildlife activity.
- Tasco Trail Camera: This camera is designed with simplicity in mind, featuring easy-to-use controls and straightforward setup instructions. It provides decent image quality and is perfect for those just starting out with trail cameras.
- Stealth Cam P18: The P18 is an entry-level camera that offers a solid performance with its infrared flash for nighttime photography. Its intuitive interface and budget-friendly price make it an excellent choice for novice users.
- Reconyx HC600 HyperFire: Although on the higher end of the beginner spectrum, this camera boasts exceptional image quality and fast trigger speeds. It’s ideal for beginners who are serious about capturing wildlife but want a user-friendly experience.
How Do These Models Compare in Terms of Features and Pricing?
| Model | Features | Pricing | Battery Life | Water Resistance | Warranty |
|---|---|---|---|---|---|
| Model A | 20 MP, 1080p video, night vision, 0.3s trigger speed | $75 – Ideal for budget-conscious buyers | Up to 6 months | IP54 | 1 year |
| Model B | 24 MP, 4K video, advanced motion detection, Wi-Fi connectivity | $150 – Higher price for enhanced capabilities | Up to 12 months | IP65 | 2 years |
| Model C | 16 MP, standard video, good battery life, easy setup | $50 – Best value for entry-level users | Up to 3 months | IP54 | 1 year |
What Installation Tips Can Help Beginners With Their Trail Cameras?
Here are some installation tips for beginners using trail cameras:
- Choose the Right Location: Selecting an optimal spot is crucial for capturing clear images. Look for areas with signs of wildlife activity, such as trails, water sources, or feeding areas, ensuring that the camera is positioned at the right height to capture the animals’ movements.
- Set the Camera at Proper Height: Installing the camera at an appropriate height, typically 3-4 feet from the ground, helps in getting the best angles and avoiding obstructions. This height also minimizes the risk of the camera being triggered by non-target animals like smaller critters.
- Avoid Direct Sunlight: Placing the camera in direct sunlight can lead to overexposed images or videos. Instead, find shaded areas or use the camera’s settings to adjust for different lighting conditions to ensure consistent and clear footage.
- Test the Camera Before Final Installation: Before securing the camera in its final location, conduct test shots to check the field of view and ensure it captures the desired area. This step helps avoid any surprises once the camera is installed for long-term monitoring.
- Secure Mounting: Use a sturdy mount or tree strap to secure the camera to prevent it from being knocked down by animals or weather conditions. A stable installation ensures that your camera remains in position and captures reliable footage over time.
- Check Battery and Memory Card: Before heading out, ensure that the camera has fresh batteries and an adequate memory card. Regularly checking these components can save you from missing important wildlife activity due to technical issues.
- Use the Right Settings: Familiarize yourself with the camera’s settings, such as resolution, video length, and trigger speed. Adjusting these settings based on your specific goals can enhance the quality of your footage and ensure you capture the best moments.
- Keep the Camera Camouflaged: To prevent theft or disturbance, try to camouflage the camera using natural materials like branches or leaves. This not only protects your investment but also makes the camera less noticeable to wildlife, encouraging more natural behavior.
Where Should a Beginner Place Their Trail Camera for Optimal Results?
For optimal results, beginners should consider several key placements for their trail cameras:
- Near Food Sources: Setting up a camera near deer feeders, fruit trees, or natural food plots can attract wildlife. Animals are more likely to frequent these areas, allowing for better photo opportunities and insights into their movement patterns.
- Along Game Trails: Identifying and placing the camera along established game trails increases the chances of capturing images of passing animals. These trails are often well-worn paths that indicate frequent animal traffic, providing a reliable spot for monitoring wildlife activity.
- Near Water Sources: Placing a camera near ponds, streams, or other water bodies can be highly effective as animals often visit these areas to drink. This strategy not only increases the likelihood of sightings but also provides a diverse range of species that may come to the water.
- At Scrapes and Rubs: Using the camera near deer scrapes or rubs can yield excellent results during the mating season. Male deer mark their territory here, and capturing images of these behaviors can provide valuable data about local deer populations and their habits.
- In Open Areas with Cover: Positioning the camera in open fields where animals can approach while still having cover nearby is beneficial. This setup allows for good visibility while providing animals with the necessary concealment to feel safe, thus increasing the chance of capturing them on camera.
What Common Mistakes Do Beginners Make With Trail Cameras?
Beginners often encounter several common mistakes when using trail cameras.
- Incorrect Placement: Many beginners fail to properly position their trail cameras, which can lead to missed opportunities. It’s essential to consider the camera’s field of view, height, and angle to ensure that it captures the intended subjects effectively.
- Improper Settings: New users often overlook the importance of adjusting camera settings such as resolution, trigger speed, and sensitivity. Setting the camera to the wrong configuration can result in low-quality images or missed shots, especially in varying lighting conditions.
- Neglecting Battery Life: Beginners sometimes do not pay attention to battery life and capacity. Using low-quality or non-rechargeable batteries can lead to frequent replacements, and failing to check battery levels can result in a camera that stops working unexpectedly.
- Inadequate Camouflage: Some novice users place their cameras without considering how visible they are to animals or potential thieves. Camouflaging the camera with natural materials can help it blend into the surroundings and reduce the chance of it being noticed.
- Not Reviewing Footage Regularly: Beginners may forget to regularly check and review the footage captured by their trail cameras. Regularly analyzing the images can provide valuable insights into wildlife activity patterns and help in adjusting camera settings or placement for better results.
- Overlooking Weather Protection: New users sometimes neglect to protect their cameras from harsh weather conditions. Ensuring that the camera is water-resistant and securely mounted can extend its lifespan and functionality in various environments.
- Ignoring Local Regulations: Beginners may not familiarize themselves with local laws regarding the use of trail cameras. Understanding regulations can prevent legal issues, especially in areas where wildlife surveillance is restricted or regulated.
How Can Beginners Avoid These Mistakes for Better Results?
Beginners can avoid common mistakes when selecting a trail camera by following these key tips:
- Research Product Reviews: Before purchasing a trail camera, beginners should read product reviews to understand the experiences of other users. This helps them identify reliable models and avoid low-quality options that may not meet their needs.
- Consider the Camera’s Features: It’s essential to assess the features of the camera, such as resolution, trigger speed, and battery life. Beginners should focus on cameras that provide a good balance of quality and user-friendly features, ensuring they capture clear images without overwhelming complexity.
- Choose the Right Location: Placement of the trail camera is crucial for capturing wildlife effectively. Beginners should learn about animal behavior and choose locations that are frequented by wildlife, while also ensuring that the camera is secured and camouflaged to avoid detection.
- Understand the Setup Process: Many beginners underestimate the importance of proper setup. Taking the time to read the manual and familiarize oneself with the camera’s settings can prevent frustrating issues later on, such as incorrect time stamps or poor image quality.
- Regular Maintenance: Trail cameras require regular checks to ensure they are functioning correctly. Beginners should make a habit of checking the camera’s batteries, memory cards, and overall condition to avoid losing valuable data and ensure optimal performance.
- Budget Wisely: While it can be tempting to go for the cheapest option, investing in a quality trail camera is important for better results. Beginners should set a realistic budget that allows for a reliable model with the necessary features, rather than settling for a low-cost camera that may lead to disappointment.